Trekking in Nepal is a remarkable adventure filled with breathtaking landscapes, cultural encounters, and unforgettable moments. Whether you're doing a short teahouse trek or a longer expedition, the trails wind through rhododendron forests, traditional villages, and some of the most dramatic scenery on earth. But it's not something to walk into blindly, a bit of preparation around permits, fitness, and the right season makes all the difference between a smooth trek and a stressful one.
Getting the logistics right matters more than most first-timers realize. Most routes now require a licensed guide along with permits like the TIMS card and conservation area fees, and weather in the mountains can shift fast enough to make serious problem. Building in buffer days, packing layers for changing conditions, and pacing yourself at altitude are the kinds of things that keep a trek enjoyable rather than exhausting.
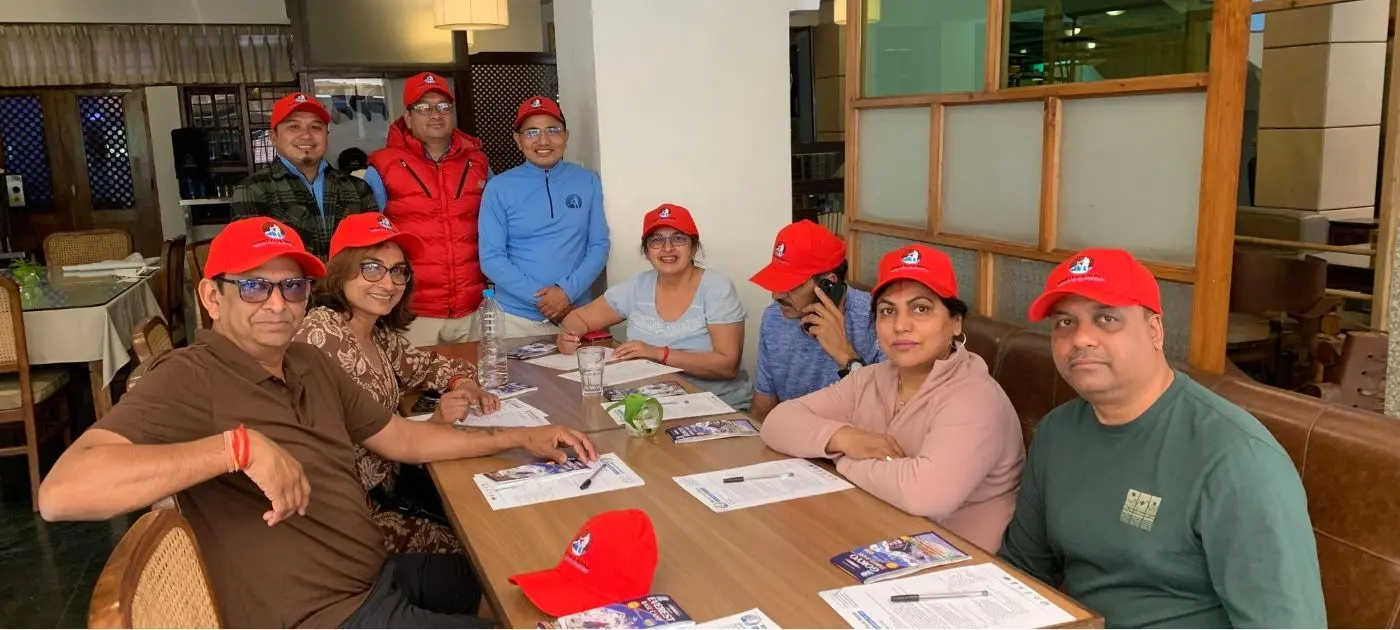
That’s where Mount Face Nepal becomes really helpful. We help trekkers with permits, itineraries, experienced guides, and practical tips tailored to your route and fitness level. Our local knowledge covers everything from acclimatization advice to packing lists, so trekkers can just focus on enjoying the trail rather than worrying about the paperwork and planning behind it.
Tip 1: Choosing the Right Trek
How to Choose the Right Trek in Nepal According to Your Fitness and Time?
Best Treks in Nepal for Beginners
Getting into trekking in Nepal can feel overwhelming, so if you're just starting out, it's smart to pick routes where the altitude isn't punishing, the walking each day is manageable, and there's always a teahouse nearby when you need one. Poon Hill is where most people begin, with just four or five days. The lodges are reliable, and the sunrise over the Annapurna is genuinely worth the early start.
If you're reasonably fit, Mardi Himal makes a nice next step with five to seven days, reaching around 4,500 m, with far fewer people on the trail and Machhapuchhre close enough to feel like you could touch it. Langtang Valley is another solid choice with seven to nine days, with altitude of around 3,870 m, with gentler gradients and a real feel for Tamang culture. And if you only want a quick taste of the Himalayas, Australian Camp or the Ghandruk loop fit the bill nicely at just two to four days, with teahouses along the way the whole time.
Best Treks in Nepal for Experienced Trekkers
For experienced trekkers, Nepal's best routes push well beyond the usual teahouse circuits. The Everest Three Passes is the big one where you cross Kongma La, Cho La and Renjo La, all above 5,300 m while the classic Everest Base Camp route with Kala Patthar adds a 5,545 m viewpoint for good measure. The Manaslu Circuit takes 14 to 17 days over the 5,106 m Larkya La pass.
Upper Mustang trades extreme altitude for genuine remoteness in a rain-shadow desert between 3,800 and 4,200 m, which means it stays dry even when the rest of the country is in monsoon. And then there are Kanchenjunga and Upper Dolpo, which are the real tests with 20 to 30 days through restricted zones with barely any infrastructure and multiple 5,000 m passes crossing.
How to Match a Trek to Your Fitness Level
| Fitness Level | Recommended Treks | Preparation Needed |
| Beginner | Poon Hill, Langtang Valley, Pikey Peak, Mardi Himal. | 4–8 weeks regular walking, stairs, light cardio. |
| Intermediate | Annapurna Base Camp, Everest Base Camp, Upper Mustang. | 8–12 weeks cardio + strength; weighted hikes 6–10 kg. |
| Advanced | Everest Three Passes, Annapurna Circuit, Manaslu Circuit, Kanchenjunga, Upper Dolpo | 8-12+ weeks trek specific training, prior high-altitude experience. |
Tip 2: Choosing Best Season to Trek in Nepal
Best Time to Trek in Nepal: Month-by-Month Weather Guide
Autumn Trekking in Nepal: September to November: Autumn really is the peak season for trekking in Nepal. From September through November the skies clear up beautifully after the monsoon, temperatures stay mild on most routes, and the views are just outstanding. The downside is the crowds and the higher prices, especially in October, so its better to book teahouses and domestic flights in advance.
Spring Trekking in Nepal: March to May: Spring comes in as a very close second peak season. March to May brings warmer days, rhododendrons in full bloom, and solid visibility across the trails. A lot of people find it just as enjoyable as autumn.
Winter Trekking in Nepal: December to February: Winter means colder nights and the chance of snow higher up, but the trails are quiet and the mountain views can be crystal clear. Lower routes like Poon Hill, Mardi Himal, or a short Langtang trek work really well. High passes often get snowed in though, so you need to be extra careful if you’re heading up there.
Monsoon Trekking in Nepal: June to August: Monsoon brings heavy rain, leeches, slippery trails, constant cloud cover, and frequent flight delays make things tricky. The big exception is the rain-shadow areas. Upper Mustang and parts of Dolpo stay relatively dry and are actually at their best during these months. However, just make sure you check the latest trail and transport conditions before you commit.
Tips 3: Altitude Sickness: How to avoid altitude sickness while trekking in Nepal
What Is Altitude Sickness and Why Does It Happen while Trekking?
Altitude sickness happens when you go up too quickly for your body to adapt to the thinner air and lower oxygen pressure that comes with higher elevations, usually above 2,500 m. It often starts with headaches, nausea, fatigue and dizziness, and in serious cases it can lead to fluid building up in the lungs or the brain.
Tip 3: Altitude Sickness Symptoms - Early vs Serious
| Category | Symptoms |
| Early/Mild (AMS) | Headache, fatigue, nausea, poor sleep, dizziness, shortness of breath on exertion. |
| Serious/Warning (HACE/HAPE) | Worsening headache, vomiting, breathlessness at rest, confusion and more. |
How to avoid altitude sickness while trekking in Nepal?
- Climb slowly once you’re above 3,000 m. Don’t gain more than 500 m of sleeping altitude in a day and give your body time to catch up before pushing higher.
- Build rest days into the itinerary every three or four days, especially at height, and use them for short acclimatization walks rather than just sitting around.
- Follow the simple “climb high, sleep low” rule — hike up to a higher point during the day, then drop back down to sleep at a lower elevation.
- Drink 3–4 liters of water every day, sipping steadily rather than gulping it all at once.
- Skip alcohol, smoking and sleeping pills because they slow your breathing at night and make it harder for your body to get the oxygen it needs.
- Stick to carb-heavy meals like dal bhat, rice and pasta as they take less oxygen to digest and keep your energy steadier than heavy fats or proteins.
- Walk at your own pace instead of trying to match faster trekkers as rushing uphill is one of the quickest ways to trigger AMS.
- Listen to what your body is telling you. If a headache, nausea or dizziness shows up, stop climbing, rest, and if the symptoms get worse drop 300–500 m rather than trying to push through.
Tip 4: Training and Preparation Tips
Getting your body ready before a Nepal trek makes a bigger difference than most people realize. A solid few months of training builds the endurance, strength and habits you’ll need to handle the long days on the trail without feeling completely wrecked.
- Start at least 8–12 weeks out and build up gradually instead of trying to cram everything into the last fortnight.
- Aim for cardio three or four times a week — brisk walking, jogging, cycling or swimming — so you can comfortably manage those 5–7 hour days.
- Add strength work twice a week focused on legs and core: squats, lunges, step-ups and planks help with the steep climbs and uneven ground.
- Climb stairs or walk on inclines regularly because that closely matches the stone steps and uphill stretches you’ll meet on most trails here.
- Train with a loaded pack, starting light at 3–5 kg and working up toward 8–10 kg so your shoulders, back and hips get used to the real weight.
- Wear the actual boots you’ll trek in so they’re properly broken in and you avoid blister surprises later.
- In the final month, do a couple of back-to-back long hikes on weekends, ideally 4–6 hours each day, to get a feel for consecutive hard days.
- Stretch every day and make sleep a priority in the last two weeks, easing off the intensity so you arrive rested rather than already tired.
Tip 5: Mental Preparation Tips
Getting your mind ready matters just as much as getting your body ready. Long days, basic teahouses, unpredictable weather, and the slow pace of altitude can make you in trouble if you are not prepared for it. These below tips will help you build the patience and resilience to enjoy the journey rather than just enduring it.
- Set realistic expectations- know that some days will feel harder than others, and that’s completely normal, not a sign you are failing.
- Embrace simplicity before you go, accepting that hot showers, reliable Wi-Fi and varied food may be limited once you are on the trail.
- Keep the itinerary flexible and build in a couple of buffer days so a weather delay or an extra rest day feels like part of the plan rather than a setback.
- Practice a few simple mindfulness or breathing exercises in the weeks leading up to the trip so you’ve got a way to settle yourself when stress or homesickness hits.
- Focus on the experience rather than fixating on the destination, because the trek is really about the days on the trail, not just the end point.
- Train in less-than-perfect conditions — cold mornings, rain, longer walks — so the discomfort feels familiar when you meet it for real.
- Stay in touch with family or friends whenever you get signal; a quick message from a teahouse can do a lot for morale.
- Know when to stop and listen to your body, since recognizing the difference between normal discomfort and a real problem is a strength, not a weakness.
Tip 6: Packing Tips (Including first aid kits)
Packing smart is one of the important Trekking in Nepal tips. It is less about bringing more and more about bringing the right things. Weather shifts fast, teahouses are basic and what you carry on your back matters every single day. These tips will help you pack light without leaving behind the essentials that keep you safe and comfortable.
- Pack in layers rather than one heavy jacket, base layer of moisture, fleece or down for warmth, and a waterproof shell for wind and rain.
- Wear sturdy, broken-in trekking boots with ankle support, and bring a pair of sandals or camp shoes for evenings at the teahouse.
- Carry a 30-40L daypack with essentials like water, snacks, a rain jacket, and your first aid kit, even if a porter carries your main duffel.
- Bring 2-3 liters of water capacity, plus purification tablets or a filter, since bottles water gets expensive and creates plastic waste higher up.
- Include sun protection- SPF 50+ sunscreen, UV sunglasses, a sun hat, and lip balm- since UV exposure is intense at higher altitude.
- Pack a headlamp, trekking poles, and a warm sleeping bag rated for high altitude, since teahouse rooms get cold after dark.
- Keep a personal first aid kit with blister plasters, bandages, antiseptic wipes, pain relievers, anti-diarrheal medicine, and any personal prescriptions.
Tip 7: Cost and Budgeting tips for Trekking in Nepal
How Much Does Trekking in Nepal Cost?
Trekking cost in Nepal depends mainly on route, duration, guide/porter, transport, season, and comfort level. Budget treks run about $35–60/day, mid-range $75–150/day, and premium $200–400/day.
| Trek Destination | Typical Duration | Average Cost (USD, per person) |
| Ghorepani Poon Hill | 4–6 days | $350–700 |
| Langtang Valley | 7–10 days | $600–1,000 |
| Annapurna Base Camp | 7–12 days | $700–1,200 |
| Everest Base Camp | 12–16 days | $1,300–2,500 |
| Annapurna Circuit | 15–20 days | $850–1,500 |
| Manaslu Circuit | 14–18 days | $1,100–2,500 |
| Everest Three Passes | 18–21 days | $1,500–2,200 |
| Upper Mustang | 10–14 days | $1,700–4,000 |
| Kanchenjunga Circuit | 18–26 days | $2,000–3,500 |
Hidden Costs Trekkers Forget while Trekking in Nepal
Beyond the basic package price, trekkers often get caught out by the small extras that add up fast with hot showers, device charging, and Wi-Fi, with all three getting pricier the higher you climb. Bottled water can hit $3–4 a bottle at altitude, and snacks or soft drinks cost two to three times valley prices, so carrying a power bank and purification tablets really saves the money. Tips for guides and porters are another cost people forget. Additionally, weather delays, especially on Lukla flights, can mean extra hotel plus rebooked flights, so building a 10–15% buffer into your budget can be really helpful.
How to Reduce Trekking Costs Without Compromising Safety while trekking in Nepal?
You can cut down the cost of trekking in Nepal without compromising on safety by heading out in the shoulder season, when teahouse prices drop around 20 % but the conditions are still perfectly fine. Sharing a guide or porter with one or two other people cuts the daily rate quite a bit, and if you keep your pack under 9–10 kg you can often do without a porter at all on the shorter routes. Using purification tablets or a filter instead of buying bottled water saves you $3–8 a day, and picking a shorter, road-accessible trek like Poon Hill or Langtang keeps both the guide fees and the transport costs lower.
Tip 8: Carry cash and emergency contacts.
Most of the Nepal’s trekking trails run almost entirely on cash only, so carrying enough Nepalese rupees before you leave Kathmandu or Pokhara is very essential. Atm’s are limited and mostly not available after passing the important trailhead towns. Even the ones that exist often run out of the money or lose power, so you can’t be sure on withdrawing cash on your mid-trek. Running out of money at 4,000 m is a real problem, since there's no easy way to get more once you're deep in the mountains. So, carry enough cash for your personal expenses such as charging, Wi-Fi, hot showers, snacks, tips, and unexpected costs.
Additionally, emergency contact matters equally too, since a helicopter evacuation or medical issue during emergencies needs quick coordination with your insurer and the family back home. Keeping these details on paper in a waterproof pouch or separate from your phone means that you are covered even if your battery dies or you lose the signal entirely.
Tip 9: Choosing reliable guides and porters
A good guide and porter can make or break your trek, so it's worth taking the time to choose them carefully rather than going with the cheapest option. Since most Nepal routes now require a licensed guide anyway, knowing what to look for helps you find someone who's genuinely experienced and treats their porters fairly.
- Verify the agency is registered with the Nepal Tourism Board and TAAN like Mount Face Nepal, and ask for the guide's license number and card before booking the trip.
- Ask how many times the guide has done your exact route, since someone who knows the trail well will handle pace, weather, and altitude far better.
- Check that both guide and porter are insured, including medical and helicopter evacuation coverage.
- Ask about porter load limits, ideally 15–20 kg per porter.
- Get the full cost breakdown in writing, covering permits, accommodation, meals, transport, and what's excluded, so there are no surprises later.
Tip 10: Checking Weather Forecast
Nepal's mountain weather can flip from clear skies to fog, rain, or snow within hours, so checking the forecast every morning before you set out is essential. Weather forecast apps give you hourly updates on temperature, wind, and cloud cover at altitude, helping you plan when to start and when to hold back.
Also, internet may not available on all parts to check weather forecasts so don’t rely on apps alone though. Teahouse owners and local guides often read the sky better than any forecast, and their advice on whether to push a pass or wait out a storm is worth taking seriously. If clouds build fast or wind picks up, delay your start or turn back rather than pushing through, since a sudden whiteout or afternoon storm can turn a routine day dangerous.
Tip 11: Choosing a Reliable Agency Like Mount Face Nepal
And the final and most important safety tips for successful trekking in Nepal is choosing the right trekking agency because a reliable one takes care of the permits, guides, safety side and all the logistics. Going with a reliable agency like Mount Face Nepal takes a real load off, especially if it’s your first trek in Nepal. Our team sorts the paperwork, books the teahouses, keeps an eye on altitude symptoms and has emergency support lined up if anything goes sideways, so you can just get on with enjoying the trail.
What we care about most is looking after both the trekkers and our own staff. The guides are licensed, trained in first aid and high-altitude rescue, and fully insured. Porters get paid fairly and we never overload them. Our pricing is transparent with no hidden extras, itineraries are shaped around your fitness and budget, and we do regular health check-ins on the higher routes.
Final Words: Trek Smart, Trek Safe, Enjoy Nepal
Nepal is easily one of the most incredible places on earth to hit the trails, but these mountains demand genuine respect. You have to honor the altitude, respect how quickly the weather can shift, understand the tricky logistics, and value the local communities who live along these routes. At the end of the day, the best trek isn't automatically the most famous one on, it's the one that actually fits your fitness, your budget, your timeline, and your experience level.
Taking time to prepare properly, hiring ethical local guides, and showing real respect for local culture is what turns a stressful and exhausting trip into an unforgettable journey. Whether you end up doing a short teahouse trek or a challenging multi-week expedition, approaching the Himalayas with the right mindset and proper support makes all the difference.